Recent Posts - Page 14

The Argon Express 2008? It's not too late!

March 05, 2008

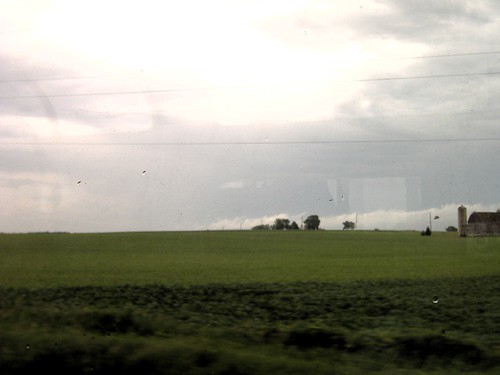
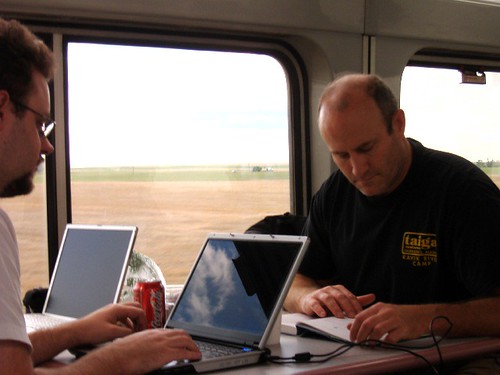
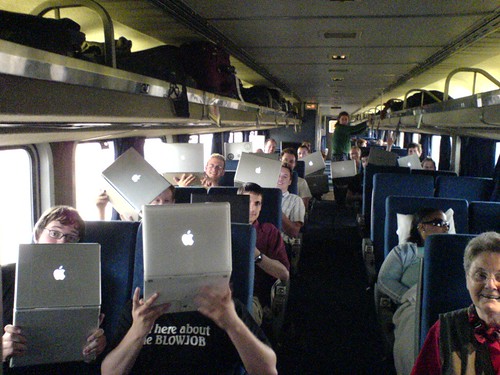
Picture yourself and your laptop. It’s been over a day and you’re sitting on a train with a group of Rails developers with a view like this over your shoulder.

Hacking and reading on the train.

Enjoying the sceneary of the U.S.A.

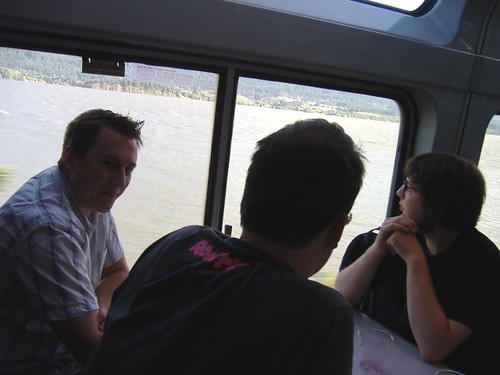
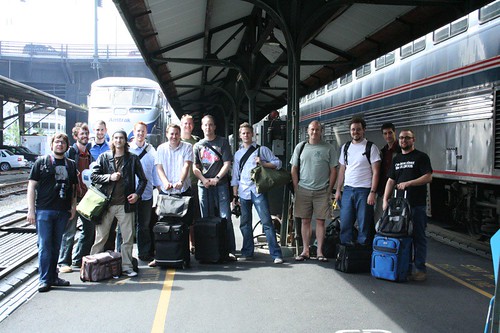
Two years ago… a group of us went from Portland to Chicago for RailsConf 2006 on the Argon Express.

I know this is a tad late… but uf you haven’t purchased plane tickets to Portland yet for CabooseConf or RailsConf 2008 and would be interested in catching the train from somewhere the East Coast, email me and we’ll talk. I’m hoping to organize the Argon Express 2008 over next few weeks.

Campfire messages in Growl

March 05, 2008

Our team has slowly been transitioning from IRC to Campfire (iPhone interface helped with this decision) for internal team discussions. Earlier today, I decided to setup Campfire to connect to Growl. There are a few scripts to do this, but I figured that I’d consolidate the steps here for my teammates and share with everyone else in the process.

Step 1: Get stuff installed

You’ll need to install the following programs on OSX.

  • Growl (install and run it)
  • Fluid.app (run a web site in it’s own
desktop app)
-   Follow instructions on their homepage (requires restart of
    Safari)

Step 2: Setup Campfire

Once you have everything installed, you can go ahead and create your Campfire Fluid application. You’ll need to provide your Campfire URL and a name for the application.

::: thumbnail Campfire
Fluid
[Uploaded with plasq’s Skitch!]{style=”font-family: Lucida Grande, Trebuchet, sans-serif, Helvetica, Arial; font-size: 10px; color: #808080”} :::

Once you get it running, you should be able to run your Campfire application in it’s own window.

::: thumbnail Campfire:
Blogging
[Uploaded with plasq’s Skitch!]{style=”font-family: Lucida Grande, Trebuchet, sans-serif, Helvetica, Arial; font-size: 10px; color: #808080”} :::

Step 3: Install the Campfire Growl script for GreaseKit

Next, you’ll want to install this script, created by Tim Harper, on userscripts.org within your Campfire Fluid.app instance.

Under the Userscripts menu, you’ll see: Browse Userscripts.org.

::: thumbnail Userscripts
[Uploaded with plasq’s Skitch!]{style=”font-family: Lucida Grande, Trebuchet, sans-serif, Helvetica, Arial; font-size: 10px; color: #808080”} :::

Find your way to the script (search for: “Campfire Growl”) to find and install the script.

::: thumbnail Growl Notifications with messages for campfire and fluid 2013
Userscripts.org
[Uploaded with plasq’s Skitch!]{style=”font-family: Lucida Grande, Trebuchet, sans-serif, Helvetica, Arial; font-size: 10px; color: #808080”} :::

Once it installs, you’ll then need to activate it in the Fluid applications management interface. Within Campfire application, go to Userscripts > Manage Userscripts.

::: thumbnail manage
userscripts
[Uploaded with plasq’s Skitch!]{style=”font-family: Lucida Grande, Trebuchet, sans-serif, Helvetica, Arial; font-size: 10px; color: #808080”} :::

Then activate it like so:

::: thumbnail activate
growl
[Uploaded with plasq’s Skitch!]{style=”font-family: Lucida Grande, Trebuchet, sans-serif, Helvetica, Arial; font-size: 10px; color: #808080”} :::

..and that’s it! When you’re not focused on Campfire… you should see Growl notifications when other people are talking in the active room.

Launch your own RubyURL

March 01, 2008

A few weeks ago, I moved RubyURL from subversion to git. During that process, I decided to use my invite to GitHub and have decided to go ahead and open up the source code.

It’s currently a whopping 92 LOC with a 1:2.5 code to spec ratio. (I had a goal to keep is below 100 LOC)

Feel free to grab it and help contribute. This has served almost 14 million redirects since August 2007 and is running on a Rails Boxcar.

To grab it with git.. run: git clone git://github.com/robbyrussell/rubyurl.git.

Feel free to submit tickets to the Rubyurl ticket system.

Enjoy!

UPDATE Ryan McGeary was kind enough to be the first person to help track down a bug and submit patches. :-)

Deploying Rails with an interactive Capistrano recipe to your Boxcar

February 28, 2008

I wanted to share something that I’ve been meaning to share on here.

When we began planning Rails Boxcar, we really want to reduce the amount of work that it took to setup and deploy a VPS for a Rails application. During this period, we began to look at the deployment process itself and began working on an interactive tool for developers for setting up their deployment environment on their Boxcar instances. So, we worked with few customers to develop an interactive Capistrano recipe.

The Goal? Spend less time configuring the server or editing recipe files.

During the initial setup, we can have the customer provide a few details from the safety of their Rails application directory by answering the following.

  • What database server will you be using? (PostgreSQL or MySQL)
  • What port does your database run on? (if different than the default
for your db server)
  • What is your database username?
  • What is your database user’s password?
  • What port will your mongrel cluster start with?
  • How many mongrel servers should your cluster run?

Great… setup the server and let’s deploy!

::: thumbnail Default
[Uploaded with plasq’s Skitch!]{style=”font-family: Lucida Grande, Trebuchet, sans-serif, Helvetica, Arial; font-size: 10px; color: #808080”} :::


[Feel free to snag our interactive Capistrano2 recipe.]{.small}

We’re trying to take the pain out of deploying your Ruby on Rails applications with Boxcar.

On a side note, we’re in the process of expanding our team and recently hired Alex Malinovich. Do stay tuned as we’ll be posting important announcements about changes to our Rails hosting services in the next few weeks. (grin)

Tip: Save your users 15+ seconds of their day

January 31, 2008

Since understanding the context is so important when designing interfaces, I wanted to point out one of those things that caused me to shake my head at.

When logging into our Basecamp account this afternoon (via openid)… I was presented the following helpful notice.

::: thumbnail know your
user
[Uploaded with plasq’s Skitch!]{style=”font-family: Lucida Grande, Trebuchet, sans-serif, Helvetica, Arial; font-size: 10px; color: #808080”} :::

What’s amusing in this scenario… is that I’m sure that Basecamp knows that I’m logged in via openid and it is, in fact, displaying the OpenBar across the top of the page. Yet, it’s making this helpful recommendation that I’m obviously already aware of.

What harm is there? Well, in this scenario, I caught it and thought, “wow, this isn’t helpful or informative.” Over time, it’s these short-lived experiences that affect our overall perceptions of the product.

When we’re designing and developing applications, we must be very consistent with how we communicate with our audience. We don’t need to provide them information that isn’t relevant to them.

I’m not picking on Basecamp here, I’m sure that they have great intentions with this, but as a developer, I know that it doesn’t take a whole lot of extra work to avoid small problems like this, which could lead your people to feel like you’re not being respectful of their time.

Saving customers 15-30 seconds is something that we can quantify.

  • 100 customers = 25-50 minutes
  • 1,000 customers = ~4-8 hours
  • 10,000 customers = 40-80 hours
  • etc…

Just a little reminder that it’s easy for us to overlook things like that can make a difference.

Installing Ruby on Rails and PostgreSQL on OS X, Third Edition

January 22, 2008

Over the past few years, I’ve helped you walk through the process of getting Ruby on Rails up and running on Mac OS X. The last version has been getting a lot of comments related to issues with the new Apple Leopard, so I’m going this post will expand on previous installation guides with what’s working for me as of January 2008.

The following guide is how our development team at Planet Argon prefers to setup our development workstations

::: warning [WARNING]{.caps}: This post contains some outdated instructions. Please read Installing Ruby on Rails, Passenger, PostgreSQL, MySQL, Oh My Zsh on Snow Leopard, Fourth Edition , which is focused on Installing Ruby on Rails on Snow Leopard. :::

During this installation, we’ll have what we feel is the optimal development stack for building Ruby on Rails applications with our favorite database server, PostgreSQL.

Ready? Let’s get started…

Phase One

During this initial phase, we’re going to install the underlying dependencies that we’ll be building off of.

XCode 3.0

The first thing that you’ll need to install to get far with this process is XCode tools, which is distributed by Apple. You can find this on the DVD that your Leopard installer is on. You can also download the latest version from Apple’s developer site.

The current version (3.0) is 1.1 GB.. so the download time will vary depending on your connection speed. I would encourage you to drink some tea and/or read a book

Once you finish the installation, you can move forward. The rest of these installation will not work until XCode is installed. :-)

MacPorts

In this next step, we’ll install MacPorts (formerly known as DarwinPorts). The MacPorts web site describes itself as, “an open-source community initiative to design an easy-to-use system for compiling, installing, and upgrading either command-line, X11 or Aqua based open-source software on the Mac OS X operating system.”

This tool is about to become one of the most important tools on your operating system as it’ll be used time and time again to maintain your libraries and many of the Unix tools that you’ll be using. If you’re from the Linux or BSD world, you are likely familiar with similar tools… such as: apt-get, port, and yum.

First, you’ll want to download MacPorts and install the “dmg” disk file for Leopard at the following link.

Once downloaded, you’ll want to run the installer and install it on your workstation.

Work you way through the installer until successfully installed.

Once this finishes, you can open up your favorite terminal application and run the following to test that it installed properly.

In my case, I’m now using Terminal.app.

Issue the command: /opt/local/bin/port version

If it responds with a version number like mine did in the screenshot above, we’re moving along nicely.

Environment Paths

When we install MacPorts, the command to install/update ports installed to /opt/local/bin. We had to provide the entire path as this isn’t currently showing up in the default $PATH on Leopard. Let’s quickly remedy this by modifying the file /etc/profile.

If you have Textmate installed, you can run the following from your terminal: mate /etc/profile

Add the following line to the bottom of /etc/profile.

export PATH=/opt/local/bin:/opt/local/sbin:$PATH

You can use your favorite editor to update this file. Once you save it, you’ll want to restart your terminal application (or open a new tab) to create a new session. When your new terminal opens, run the following to verify that port is showing up in your $PATH.

which port

You should see /opt/local/bin/port show up as the result of this command.

Great, let’s continue to move forward.

Hiding Apple’s Ruby, Gems, and Rails

Before we install Ruby from MacPorts, we’ll go ahead and hide Apple’s Ruby installations.

	:~ robbyrussell$ sudo su -
	Password:
	:~ root# mv /usr/bin/ruby /usr/bin/ruby.orig
	:~ root# mv /usr/bin/gem /usr/bin/gem.orig
	:~ root# mv /usr/bin/rails /usr/bin/rails.orig
	:~ root# logout	

If you ever decide to remove MacPorts, you can just rename ruby.orig back to ruby and you’re back where you started… and the same for the others listed.

Phase Two

During this next phase, we’re going to install Ruby and Ruby on Rails.

Installing Ruby via MacPorts

Now that we have MacPorts up and running, we’re going to use it for the first time. We’ll start by using it to install Ruby and the Rubygems package.

$ sudo port install ruby rb-rubygems

Okay, this will take a little while. I’d suggest that you step out to get some fresh air.

How was it outside? What’s the weather like there today? It’s currently 2:30am PST so it’s dark and an 28F outside so I didn’t stay outside very long.

If you’re still waiting for it to install, perhaps you could watch the following video. I might encourage you to check out more of Jam, which was recommended a few years ago to me by James Adam at Canada on Rails.

Be warned… it’s a strange show, but I find strange things like this funny. :-)

If you prefer something a bit more lighthearted…

Okay… when Ruby finishes installing, you’ll want to test that you can run it.

$ ruby -v

Great, let’s move forward!

Installing Ruby on Rails via RubyGems

We’re now going to install the libraries that make up Ruby on Rails via RubyGems.

$ sudo gem install --include-dependencies rails

This will install the following gems.

  • rails-2.0.2
  • rake-0.8.1
  • activesupport-2.0.2
  • activerecord-2.0.2
  • actionpack-2.0.2
  • actionmailer-2.0.2
  • activeresource-2.0.2

Excellent, let’s move forward…

If you haven’t already purchased it, I recommend that you take a look at The Rails Way (Addison-Wesley Professional Ruby Series) by Obie Fernandez.

Installing Mongrel via RubyGems

Let’s now install Mongrel, which is an excellent Ruby-based web server for Ruby on Rails applications. We use it in development and production at Planet Argon and it’s also what we recommend to our hosting customers.

$ sudo gem install --include-dependencies mongrel mongrel_cluster
  • Note: Be sure to select the proper platform for mongrel. (hint: OS X is NOT mswin32)

My terminal output:

Select which gem to install for your platform (i686-darwin9.1.0)
 1. mongrel 1.1.3 (java)
 2. mongrel 1.1.3 (i386-mswin32)
 3. mongrel 1.1.3 (ruby)
 4. mongrel 1.1.2 (ruby)
 5. mongrel 1.1.2 (mswin32)
 6. mongrel 1.1.2 (java)
 7. Skip this gem
 8. Cancel installation
> 3
Select which gem to install for your platform (i686-darwin9.1.0)
 1. fastthread 1.0.1 (mswin32)
 2. fastthread 1.0.1 (ruby)
 3. Skip this gem
 4. Cancel installation
> 2
Building native extensions.  This could take a while...
Successfully installed mongrel-1.1.3
Successfully installed gem_plugin-0.2.3
Successfully installed daemons-1.0.9
Successfully installed fastthread-1.0.1
Successfully installed cgi_multipart_eof_fix-2.5.0
Installing ri documentation for mongrel-1.1.3...
Installing ri documentation for gem_plugin-0.2.3...
Installing ri documentation for daemons-1.0.9...
Installing ri documentation for fastthread-1.0.1...

No definition for dummy_dump

No definition for dummy_dump

No definition for rb_queue_marshal_load

No definition for rb_queue_marshal_dump
Installing ri documentation for cgi_multipart_eof_fix-2.5.0...
Installing RDoc documentation for mongrel-1.1.3...
Installing RDoc documentation for gem_plugin-0.2.3...
Installing RDoc documentation for daemons-1.0.9...
Installing RDoc documentation for fastthread-1.0.1...

No definition for dummy_dump

No definition for dummy_dump

No definition for rb_queue_marshal_load

No definition for rb_queue_marshal_dump
Installing RDoc documentation for cgi_multipart_eof_fix-2.5.0...
Successfully installed mongrel_cluster-1.0.5

Great, you have almost all of the essentials.. except a database.

Phase Three

In this phase, we’re going to get our database server, PostgreSQL, installed and the libraries that Ruby needs to communicate with it.

Installing PosgreSQL with MacPorts

At Planet Argon, we design and develop our applications on top of PostgreSQL. I’ve been advocating the adoption of this awesome open source database in the Rails community for quite some time now.

The current version available of PostgreSQL via MacPorts is 8.3, which is what we’ll now install with the port command.

$ sudo port install postgresql83 postgresql83-server

This will download and install the necessary libraries to run PostgreSQL server and the client utilities.

Configuring PostgreSQL

When PostgreSQL is finished installing, it’ll tell you to run the following commands to create a new database instance.

 sudo mkdir -p /opt/local/var/db/postgresql83/defaultdb
 sudo chown postgres:postgres /opt/local/var/db/postgresql83/defaultdb
 sudo su postgres -c '/opt/local/lib/postgresql83/bin/initdb -D /opt/local/var/db/postgresql83/defaultdb'

Adding PostgreSQL to launchd

If you’d like to have PostgreSQL automatically startup after a system restart, you can load it into launchd, which comes with OS X. By running the following command, PostgreSQL will startup automatically on the next system restart.

sudo launchctl load -w /Library/LaunchDaemons/org.macports.postgresql83-server.plist

Adding PostgreSQL to your $PATH

For some reason, the MacPort for PostgreSQL doesn’t get the programs in your path automatically, so we’ll it now.

mate /etc/profile

Modify the PATH that we changed earlier to include /opt/local/lib/postgresql83/bin@.

export PATH=/opt/local/bin:/opt/local/sbin:/opt/local/lib/postgresql83/bin:$PATH

Save the file and then open a new terminal. To test this, you should get the following output when you run which psql.

	:~ robbyrussell$ sudo su -
	Password:
	:~ root# mv /usr/bin/ruby /usr/bin/ruby.orig
	:~ root# mv /usr/bin/gem /usr/bin/gem.orig
	:~ root# mv /usr/bin/rails /usr/bin/rails.orig
	:~ root# logout	
```0

#### Creating a new PostgreSQL user

When I’m working on Rails applications in my development environment, I
really don’t want to have to specify a username and password in every
`config/database.yml` file for each of our ongoing client projects. When
PostgreSQL was installed, it created a superuser named **postgres**,
which is great, but I’d like one that matches my system username, so
that I’m not prompted at all for a username or password to connect to
PostgreSQL.

To do this, we’ll use the `createuser` command, which comes with
PostgreSQL. As you can see, I’m creating a new user with `superuser`
privileges (and will hopefully be the last time I have to do a
`-U postgres`).

:~ robbyrussell$ sudo su -
Password:
:~ root# mv /usr/bin/ruby /usr/bin/ruby.orig
:~ root# mv /usr/bin/gem /usr/bin/gem.orig
:~ root# mv /usr/bin/rails /usr/bin/rails.orig
:~ root# logout	 ```1

Let’s take a quick moment to test this out.

	:~ robbyrussell$ sudo su -
	Password:
	:~ root# mv /usr/bin/ruby /usr/bin/ruby.orig
	:~ root# mv /usr/bin/gem /usr/bin/gem.orig
	:~ root# mv /usr/bin/rails /usr/bin/rails.orig
	:~ root# logout	
```2

Great, everything looks good here.

We now have a running installation of PostgreSQL with a new user
account. All we need to do now is install the appropriate RubyGem to
allow our Ruby applications to connect to it.

#### Installing PostgreSQL Libraries for Ruby

You can install postgres gem by running the following command.

:~ robbyrussell$ sudo su -
Password:
:~ root# mv /usr/bin/ruby /usr/bin/ruby.orig
:~ root# mv /usr/bin/gem /usr/bin/gem.orig
:~ root# mv /usr/bin/rails /usr/bin/rails.orig
:~ root# logout	 ```3

Great. We’ve now built a professional development environment for working with Ruby on Rails. Can you feel the excitement? :-)

Closing Thoughts

Like the previous versions, I hope that a few people find this useful. I didn’t have to make a lot of changes from the second edition, but there were enough to warrant a new post. I’ve been setting up my workstation like this for about three years now and I’m looking forward to seeing how a fresh install on Leopard works out for me.

If you have any problems, feel free to ask a question in the comments below.

Heading to London, grab a pint?

January 18, 2008

Just when you think that you’re sneaking through Fall/Winter without getting sick… it hits you. Been sick the last week and am finally coming up for air. :-)

Anyhow, I’m going to be traveling a few times over the coming weeks/months and wanted to reach out…

Dear Londoners,

A few of us from the Planet Argon team, (Andy, Paige, and myself) are heading to London in just over a week to visit one of our big clients. We’ll also be staying for a few more days to explore. If you’re interested in grabbing a few pints and/or interested in meeting up, drop me an email we’ll try to coordinate something when we’re over there. =)

ShortURL 0.8.4 released and gets a new mainainer... me!

January 06, 2008

Earlier today, Vincent Foley was kind enough to hand over maitenance of the the ShortURL project on RubyForge to me. He first released it back in 2005, which I blogged about as RubyURL was the first shortening service that it supported (and is the default). Unfortunately, the release of RubyURL 2.0 broke backwards compatibility and Vincent wasn’t maintaining it anymore. So, earlier, I decided to patch this and got a new version released that now works with the current RubyURL site.

While working on the code, I decided to extend the compatible services to include moourl and urlTea.

These updates are available in ShortURL version 0.8.4.

Install the ShortURL gem

Installation is a snap… (like 99.7% of rubygems…)

~ > sudo gem install shorturl                                                                                                                                                                                                           Password:
  Successfully installed shorturl-0.8.4
  1 gem installed
  Installing ri documentation for shorturl-0.8.4...
  Installing RDoc documentation for shorturl-0.8.4.  

Using ShortURL

The ShortURL gem provides the ShortURL library, which you can use from any Ruby application.

Using the ShortURL library

~ > irb                                                                                                                                                                                                                           
  irb(main):001:0> require 'rubygems'
  => true
  irb(main):002:0> require 'shorturl'
  => true
  irb(main):003:0> ShortURL.shorten( 'http://www.istwitterdown.com' )
  => "http://rubyurl.com/P9w"

As you can see…it’s really straight forward.

Let’s try it with a few other services.

irb(main):004:0> ShortURL.shorten( 'http://www.istwitterdown.com', :moourl )
=> "http://moourl.com/fvoky"
irb(main):005:0> ShortURL.shorten( 'http://www.istwitterdown.com', :tinyurl )
=> "http://tinyurl.com/2t3qmh"

Using the shorturl command-line tool

Many people don’t know that ShortURL provides a command-line tool, which you can use after installing the gem.

~ > shorturl http://istwitterdown.com                                                                                                                                                                                               
  http://rubyurl.com/Lwk

If you’d like to see more services provided than the ones listed here, please submit feature requests and/or patches on the rubyforge project.

ShortURL Documentation

To see the latest documentation for the project, please visit:

My favorite part about this? My rbot plugin for RubyURL works again!

::: thumbnail rbot and
rubyurl
[Uploaded with plasq’s Skitch!]{style=”font-family: Lucida Grande, Trebuchet, sans-serif, Helvetica, Arial; font-size: 10px; color: #808080”} :::

Happy URL-shortening!

RubyURL through QuickSilver

January 06, 2008

When Chris Griffin saw this post, he wanted to do the same with RubyURL. Since the ShortURL gem was broken, I didn’t get a chance to dive into it. However, with the shorturl command now working again with RubyURL, we get QuickSilver and RubyURL working together really quickly.

First, you’ll need a recent version of the ShortURL gem installed.

sudo gem install shorturl

Then you will want to add the following to ~/Library/Scripts/rubyurl.scpt. You will need to create this file.

Review: FogBugz, part 1

January 01, 2008

Today, I thought that I’d give FogBugz a quick trial. A few of our Rails consulting clients use it and I’m hearing that others are as well.

Along the way, I’m bringing one of my favorite tools so that I can share some things thoughts (visually) along the way.

Signing up for a free trial

My first impression of FogBugz was, “nice homepage design… but what is that screenshot of?”

::: thumbnail FogBugz - Project Management
Software
Uploaded with Skitch!{style=”font-family: Lucida Grande, Trebuchet, sans-serif, Helvetica, Arial; font-size: 10px; color: #808080”} :::

I’m not a designer, but the interface in the screenshot isn’t jumping out to me as something that you’d expect to see in a modern web application. While I appreciate the default browser colors for links (this is really important)… I think they could have found a better way to distinguish which bug links you’ve previously viewed. It’s very likely that you’ll most bugs many times, so having the color be different might not make sense in the same way it would when reading content on a web site. Again, I’m not a designer and I’d be curious to hear from a designer on this. Just something that I initially thought.

::: thumbnail FogBugz - Project Management
Software
Uploaded with Skitch!{style=”font-family: Lucida Grande, Trebuchet, sans-serif, Helvetica, Arial; font-size: 10px; color: #808080”} :::

Okay, this sign up form seems really easy to start with. I’m used to free trials being really simple to get going. So, I enter in my sub-domain selection and provide my email address on the following page so that they can confirm that I’m legit.

(several minutes later…)

Okay, this process required me to jump from my browser to my email to my browser back to my email and then back again to my browser. It’s really frustrating for an application to force me to go back and forth between my browser and email client. I think the initial email is something I can cope with, but I found it a bit silly to have to wait for another email to receive a link to login to my new account, especially considering I already knew the URL as that was the first thing that I provided. The application could have provided the link (or redirected me) to the following form, which I had a few things to comment on.

::: thumbnail change choose
wtf
Uploaded with Skitch!{style=”font-family: Lucida Grande, Trebuchet, sans-serif, Helvetica, Arial; font-size: 10px; color: #808080”} :::

At first glance, this might not seem like much… but I’m becoming more and more disappointed by the choice of language that we’re using in applications. First of all, this is the first time that I’ve seen this page. I’m not changing my password… what you’re really asking me to do is, “Create (or set) a password.” There are other verbs that you could use here, but change really isn’t appropriate. Also, choose doesn’t work here either.

Advanced Mathematics and Programming

January 01, 2008

First of all, Happy New Year!

The other day I received an email from a friend where she asked me if I thought that having excellent math skills were important in a programmers career. I’ve heard this question asked before and while I thought that might have been the case when I was a lot younger (when I had zero plans to go into the IT world)… I’ve not seen this to be true. My response to her was that it really depended on the types of programming work that one might want to go into. There are definitely programming jobs that require extremely advanced mathematical skills, but I’d guess that many, if not most, don’t really have that sort of prerequisite.

So, as I was saying. I think it really depends. It depends on what sort of programming you’re interested in pursuing. In general, when we’re looking to hire someone at Planet Argon, we’re looking for people with good research and problem solving skills. Programming languages are tools to help solve problems and build things. So, while math skills are useful, they aren’t likely going to make or break a developer.

Like any career, it should be something that you’re passionate about.

I’m curious. As programmers… how would you respond to the following question?

“Should an advanced knowledge of mathematics be a prerequisite in pursuing a career in programming?”

I can only answer the question from my own perspective and would like to share some others. Thanks!

PGCon 2008 - Call for Papers

December 28, 2007

Are you using PostgreSQL (the world’s most awesome open-source database server) with Ruby on Rails Do you have any interesting experiences that you might want to share with an audience? Well, you might consider submitting a talk proposal for PGCon 2008, which is taking place in Ottawa, Canada.

Details follow…

PGCon 2008

PGCon 2008 will be held 22-23 May 2008, in Ottawa at the University of
Ottawa. It will be preceded by two days of tutorials on 20-21 May
2008.

We are now requesting proposals for presentations.

If you are doing something interesting with PostgreSQL, please submit
a proposal. You might be one of the backend hackers or work on a
PostgreSQL related project and want to share your know-how with
others. You might be developing an interesting system using
PostgreSQL as the foundation. Perhaps you migrated from another
database to PostgreSQL and would like to share details. These, and
other stories are welcome. Both users and developers are encouraged
to share their experiences.

Here are a few ideas to jump start your proposal process:

  • novel, unique or complex ways in which PostgreSQL are used
  • migration of production systems to PostgreSQL
  • data warehousing with PostgreSQL
  • tuning PostgreSQL for different work loads
  • replicating data on top of PostgreSQL

Both users and developers are encouraged to share their experiences.

The schedule is:

  • 19 Dec 2007 Proposal acceptance begins
  • 19 Jan 2008 Proposal acceptance ends
  • 19 Feb 2008 Confirmation of accepted proposals
  • 19 Apr 2008 Final papers/slides must arrive no later than this date

See also http://www.pgcon.org/2008/papers.php

Instructions for submitting a proposal to PGCon 2008 are available
from: http://www.pgcon.org/2008/submissions.php

This