
Action Cable demo by DHH in Rails 5
David was kind enough to put together a demonstration of how to take advantage of Action Cable in Rails 5.
In the video he puts together a small chat application.
David was kind enough to put together a demonstration of how to take advantage of Action Cable in Rails 5.
In the video he puts together a small chat application.
Yesterday, I found out that Ezra Zygmuntowicz had passed away.
Ezra and I first met in the #Caboose family. The first time we got to spend time together, in person, was at RailsConf 2006.

(photo credit: Jarkko Laine)
A few weeks later, he emailed me to ask about getting a job here at Planet Argon. We couldn’t afford him so he continued to pursue other paths… and a month later was helping found EngineYard.
(…one of those things that I still find myself asking, “what if we could have?”)
Back when Planet Argon had a hosting department, Ezra and I collaborated on various deployment best-practice projects. He was always helping our team figure out how to make deployment easier. Some of us might remember his famous nginx configuration (the closest version I could find). He was an active contributor in the Ruby on Rails Deployment group that I started. He was always around to help the community.
Ezra always seemed to find time for the community… whether on mailing lists, at conferences, commenting on our blogs, or chatting over IRC.
When Ezra and his family moved to Portland, we made several half-assed attempts to schedule time to catch up again in person. It never happened and our interactions were limited to keeping up on Facebook
His passing is a great loss to our community.
To his friends and family, I am sorry for your loss.
To his son, (should you ever discover this), your father helped pave the way for hundreds of thousands (if not millions?) of software developers around the globe—whether they know it or not. He was constantly looking for innovative ways to solve problems. His talks at conferences were always fascinating… and the rest of us would sit back and think, “where does he come up with these ideas?!”
He was a trailblazer.
He will be missed.
Thank you for everything, Ezra.
Update: If you would like to contribute to the memorial fund for Ezra’s son, Ryland, please visit this campaign on indigogo.
Attention all Ruby on Rails Developers… you have six days to complete the 2014 Rails Hosting Survey.
All of the results will be shared with the community. Consider this your civic duty of the day. :-)
Recently, I found reading an article by Paul Venezia titled, Fatal abstraction: A bottom-up view of high-level languages, where—if you read between the lines—you can see that Paul just found himself waking up from a coma and it’s no longer 2004.
“I may have questioned Perl’s future now and then, and Perl certainly doesn’t have the presence it once enjoyed, but the strength of Perl has always been its flexibility. You can do pretty much anything with Perl, and you can do it in a wide variety of ways. Perl’s core revolves around the idea that there’s always more than one way to do it. In fact, there may be dozens of ways to do it. PHP shares a similar trait in that it gives you a large set of tools and leaves the construction up to you.
Ruby, and especially Rails, is the opposite, and Python definitely leans more in that direction. Essentially, it’s the difference between building a chair from raw lumber and assembling one from IKEA. This isn’t to say there’s anything wrong with assembling from parts, and clearly Ruby and Python are very capable and strong languages. However, they’re not my cup of tea.”
Admittedly, perhaps I’ve been in drinking the “kool-aid” for far too long, but I thought this tired argument has run it’s course.
I take huge offense to comparing Ruby on Rails to IKEA furniture. It’s far easier to build a web application with Ruby on Rails than it is to build an IKEA bookshelf
“When it comes right down to it, I need to know exactly what my code is doing. I’m going to keep an open mind and spend more time on the other side of the fence in the short term. Perhaps I’ll be won over, but it won’t be easy. Trust issues are complicated.”
Paul, I completely understand where you’re coming from. It sounds like you’re dealing with similar trust issues that I had nearly a decade ago. Trust me, it will be okay.
Ruby on Rails isn’t magic. Behind the curtain you’ll find a collection of object-oriented code written in one of the most readable languages in existence.
Hello! It’s been two years since Planet Argon last asked the Ruby on Rails community how they were deploying and hosting their applications and we thought it was time to checkin with people.
Until April 30th, you can take the survey here.
It was a long time coming… but we finally got a web page designed and deployed for Oh My Zsh.
Check it out! (and tell your friends to ditch bash)
Over on the Planet Argon blog, you can read an enlightening interview with two of our Jr. Ruby on Rails developers. Both of them made a career change in their 30s and went through a coding academy here in Portland, Oregon.
![]()
We’re all excited about the prospect of a new code editor (Atom Editor). We all love what Github has produced so far and our expectations for anything new are going to be quite high.
Do we know exactly what it’ll be yet? Not quite. We have some hints… but until it’s released… we’ll continue to speculate.
While I am not one to make predictions—I do have a few theories about what Atom will not do for us. (if you’re looking for a new business idea… feel free to snag any of these)
1. Atom Editor will not make it easier to code while in the shower. While I would love to take advantage of putting my thoughts to code while letting my conditioner do it’s thing… I don’t believe they’re trying to solve this problem (yet).
2. Atom Editor is not going to make it difficult for me to produce shitty code. To date, nearly every code editor on the market is focused on making it easier to produce code…. good AND/OR bad. Where is the editor that tells us to quit while we’re head. “Are you serious, Robby? Have you seen what you’ve been writing today? Just stop. Go outside. Take a break and try again tomorrow.”
3. Atom Editor will not bring synergy to developers.
4. Atom Editor will not change the music playing to compliment the coding problem that I’m faced with. If my tests aren’t passing… I wish my music would keep me calm and focused. This is not a time to start playing WHAM! (…or maybe it is)
5. Atom Editor will not bring about peace in the Emacs vs Vim wars. We are going to have to let them sort a peace deal on their own.
6. Atom Editor will not have integrated CVS or Subversion support when it is released.
7. Atom Editor will not promise the world to you like Visual Studio.NET did back in 2002. I remember their demo videos and it seemed like the development world was about to change! I never would have guessed that come 2005, I’d be in love with something as simple and fancy-feature-less as TextMate.
8. Atom Editor will not just be a clone of Sublime Editor. Github has too clever a team for that objective.
What are you confident that Atom Editor will not be?
8 for 8!
funny how Twitter warned me that a bunch of my friends at GitHub are all a sudden interested in https://t.co/cb52btuPZe
— Matt Aimonetti (@mattetti) February 26, 2014
…which leads us to

Initial sources suggest that will be one of the biggest app releases of the year.
It’ll be loved by many. Hated by some.
For more details… visit Atom.io or Atom Beta
Dear \@ohmyzsh users… we are ready! ;-)
As we learn more… I will try to keep this updated. Here are a few “screenshots” people have posted on twitter.


Some animated gifs:


Stay tuned…
SOON.
— Tom Preston-Werner (@mojombo) February 26, 2014
You might consider following @AtomEditor on twitter.
It’s been an odd day. The sort of day where you really don’t know what to say. The only thing you can manage to get out is, “Sigh. I’m going to miss him.”
Jim Weirich was building interesting stuff with Ruby several years before I was introduced to it. Tools that most of us have taken for granted. Tools that were just there.
Before Jim came along… they didn’t exist.
Back in the early Ruby on Rails explosion era (circa 2004-2006), it was much easier to get to know the great Rubyists. I remember finally getting a chance to meet Jim (and _why) at FOSCON here in Portland, which still goes down as one of the best “conferences” I have ever attended.
(I think we all knew something special was happening.)
Jim spoke at a ton of conferences. At any conference that I seemed to get invited to speak at… Jim seemed to always be on the speaker list too. We’d end up meeting up on the conference circuit a several times over the coming years. It was always a delight to catchup.
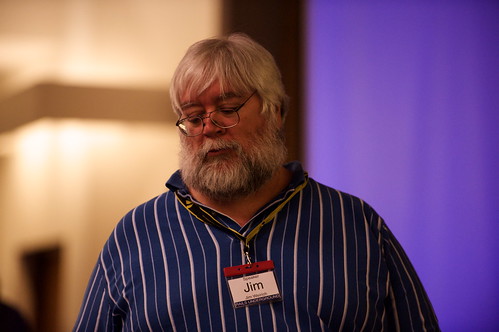
Photo by Obie from Rails Underground
2009
I believe the last one was in 2009 at Rails Underground in London. I remember walking in one of the rooms and spotting Jim. There he was… waiting patiently for his time slot… sitting by the wall in another horribly uncomfortable conference chair… hacking away on his laptop as if he was on a mission to save the human race. In reality, he was probably toying around with some new idea.
As I walked towards him… my red hair must have caught the corner of his eyes… because he looked up and with the warmest of smiles and kindest of voices said, “Robby!”
It’s people like Jim that helped me feel like I had something valuable to contribute to the community. The mere fact that he knew who I was, that he commented on my silly blog posts, referred potential customers to me, showed up for and complimented me on my talks, asked ME for advice on IRC, wished me a happy birthday on Facebook, responded to my lazy tweets… made me feel like I was welcome to (and part of) the party.
A party that started a number of years before I showed up.
Let us raise our glasses high and thank our host for the pleasure of being amidst his most generous company.
Thank you, Jim, for helping me learn more about myself. I only wish I had gotten to know you more.
We’ve had a number of clients in New York over the years. After a recent trip this last fall to visit clients and attend “Cultivate”:, we decided that we should spend more of our time in the city.
In 2014, we’re looking to expand our client base there. If you’re in the NYC area and are looking for an agency that has great Ruby on Rails developers… get in touch.
Earlier today, I noticed that we now have over 500 developers from around the globe who I have accepted pull-requests from[^1^](#fn1){#fnref1 .footnote-ref role=”doc-noteref”}. That is so fantastic.

Thanks to each and every one of you who has helped make this project so wonderful for others. :-)